Long Exposures can seem tricky and quite daunting, especially when you’re not familiar with doing them. Honestly though, it doesn’t need to be as difficult a task as it appears. In this blog, I’m going to skip as much of the technical aspects as possible, so we can focus more on just getting the shot. It’s a very lengthy post, but easy to understand (I hope). Side Note: After trying some long exposures, if you decide you rather like it and might want to pursue it further, I highly suggest learning some more of the technical side of it, as it can make doing so less hit-or-miss.
The list of things you’ll absolutely need is minimal:
- Camera.
- Tripod (or another way of keeping the camera perfectly still).
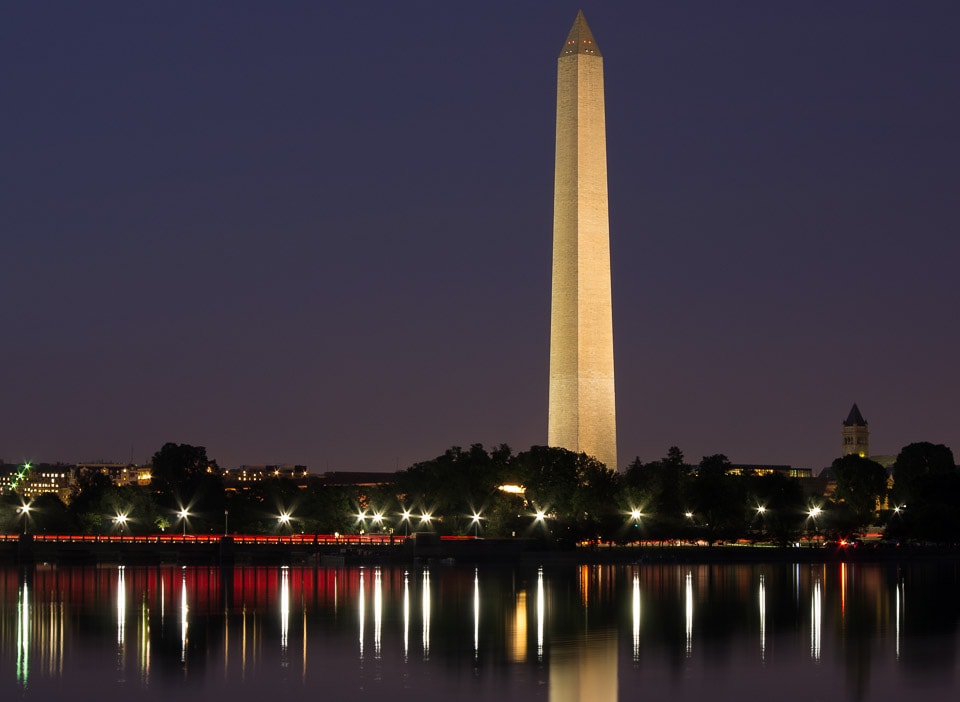 |
| 15 second exposure to smooth the water |
Darkness is Your Friend: The example shots I’ve included are all taken at night, because night is dark and naturally opens itself up to doing long exposure photography. Long exposures can also be done during the day, but you’ll need a way to make it dark enough to do a lengthy exposure. Neutral Density (ND) filters are designed for this. They darken what your camera sees, without changing anything else. Think of them as sun glasses for your camera. The darker the filter, the longer the exposure it’ll allow you to take. Some people use 2 polarizers stacked on top of each other to do this. It works, but keep in mind that doing it this way might alter the White Balance of your light (an easy fix).
Setup: You’ll want your camera on a tripod. If you don’t have a tripod, there may be other sturdy surfaces you can use. If it’s windy and your tripod is cheap, it’s going to move with the wind. You can minimize this by attaching some weight to the center post of the tripod. Also, the wind will catch on your camera’s strap. Sometimes, I just stand on the side of my camera that the wind is coming from and open up my jacket to block as much of the wind as I can. You’d be surprised the difference.
Basic Settings: There are other settings we can use, but we’re going to be shooting in Manual (or Bulb). Egad! It’ll be too dark to rely on the camera to get the exposure right. Also, we’re going for creative shots, so the “right” exposure may not be right. The Exposure Triangle consists of Shutter Speed (Time), Aperture, and ISO. We need to set these, but it’ll be pretty easy. We already have a good idea what we want for time (at least 15 seconds), so we set that. Also, lower ISO’s yield less noise, so we usually go as low as we can (80 on my camera). That leaves only one setting left! Aperture in the mid-range (5.6-11) usually offer the sharpest results, though wider open lets more light in for stars. I usually stay around f/8 or f/11, unless I’m shooting stars, at which point I go wide open. No rule, just how I do it. These settings will change later, but we at least have a starting point.
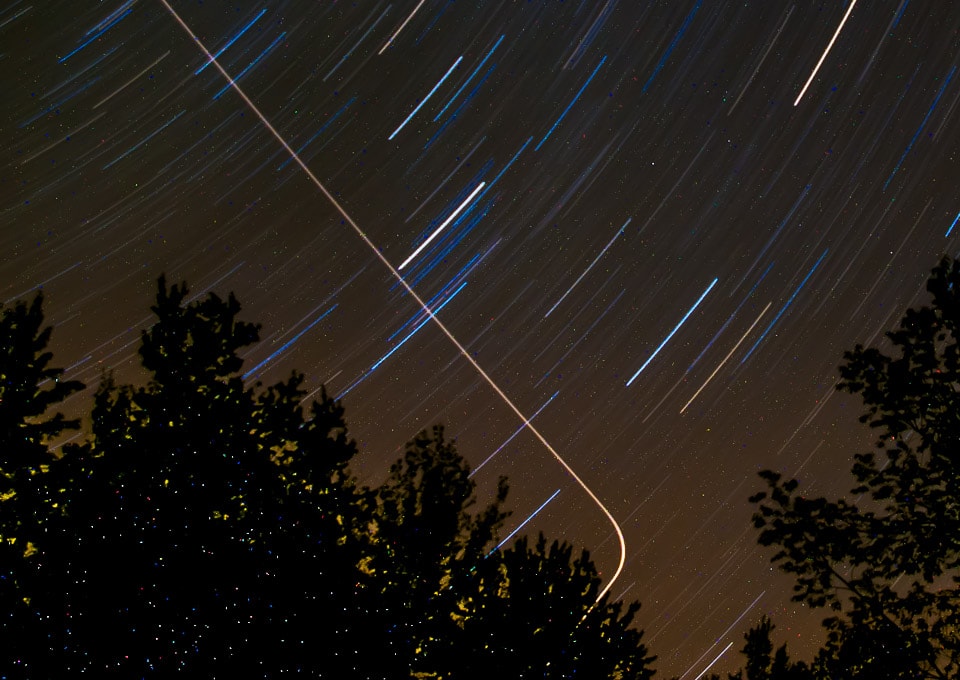 |
| 27 minute exposure. Curved streak of light was a plane |
Special Settings: Each camera is different, but most have similar settings to be found in their menus. I’m speaking from a Pentax perspective, but all of this should be fairly universal.
Vibration reduction (Image Stabilization) should be turned off. Yes, off. (Many cameras do this automatically when the camera is in Manual or Bulb mode) When the camera is on a sturdy tripod, vibration reduction tries to correct vibrations that aren’t there. This actually causes vibrations that could have been avoided!
Autofocus isn’t going to work well when it’s dark (or using ND filters). Use manual focus. With filters, focus ahead of time and then apply the filter. At night, manually focus on a bright star or a distant street light.
Mirror Up (or Mirror Lock Up) is likely available in your camera’s options. Mirror up causes a DSLR to pop the mirror up, wait a few seconds, and then begin the shot. This allows any vibrations caused by the “mirror slap” to go away before the actual exposure begins. Very useful if your tripod is cheap.
Remote Controls help so much. Touching your camera will make it vibrate. Remotes allow you to avoid needing to touch the camera. If you don’t have one, I suggest using your camera’s delayed timer feature, causing the camera to wait several seconds before the exposure begins. Note: Delayed timer works in Manual, but not in Bulb mode.
Avoiding Star Trails: Most people wonder how to get star trails. That’s simple. Take a really long shot under really dark conditions. Longer the shot, the longer the trails will be. Go too long, light pollution from nearby towns will bleach out the sky though. Play around and practice to find what’s right for your area.
What if you want to avoid having star trails though. Say you want a bright stars, as pinpoints instead of streaks? There is what’s known as the 500 Rule. 500/mm = seconds. Say I’ve got a 35mm lens on my camera. My camera has a crop factor of 1.5 (most crop sensor dslr’s are roughly the same). The 35mm is roughly the equivalent of a 50mm lens. Putting this into the formula (500/50 = 10), I’d be able to take a 10 second exposure before noticeable trails started forming. If you don’t like math, go HERE and scroll down for some charts that have done the math for you. Look for your type of sensor and your lens, and the chart will tell you the longest exposure you should take if you want pinpoint stars.
So… You take your 10 second pinpoint star shot and find out that it’s too dark. What do you do? Boost the ISO! This will add noise to your image, but you may be surprised at how little you notice. Also, you can widen up your aperture if you haven’t done so already.
Taking the shot: I see clouds lit in moonlight. I want to take a long exposure with the clouds blurred, but I don’t know what exposure I’m going to need. How do I figure it out? Well, two different methods come to my mind:
Method One: If I have a general idea of what I want for my final product, I can start with some educated guesses. The lowest ISO my camera will do, as I want everything smooth and noiseless. A mid-range aperture to keep things sharp, although I’m not overly committed to this. As for time, I just want to make sure the clouds are streaked. I take a guess about this and think that 30 seconds will do.
After taking a shot, if I see the streaks are too long/short, I’ll adjust the exposure time accordingly. Perhaps I went down to only 15 seconds? Since I cut my time in half, I just made things darker, so I have to either increase exposure or widen the aperture.
After taking a shot, if I see the streaks are perfect but the image is too dark, I’ll increase ISO or widen the aperture. If the image was too bright, since I’m at my lowest ISO already, I’ll just narrow the aperture.
Method Two: If I have no clue what to start with as an exposure, I’m going to ramp my ISO with my exposure time something relatively short (say, 1 second) and take a sample shot. If the image is too dark/bright, I’m going to adjust the time, then take another shot. I’ll do this until I have a good exposure. Say 1/4 second at ISO 51,200 was my perfect exposure. My noisy, disgusting, perfet exposure. Well, I want to bring the ISO down to where it’ll be prettier. 52000, 26000, 12800, 6400, 3200, 1600, 800, 400, 200, 100… That’s 9 stops (I halved the ISO 9 times). So now I need to double the exposure time 9 times… 2 minutes! Done. Experimenting at the higher ISO allowed me to get a sample shot ever second or so, rather than once every couple minutes.
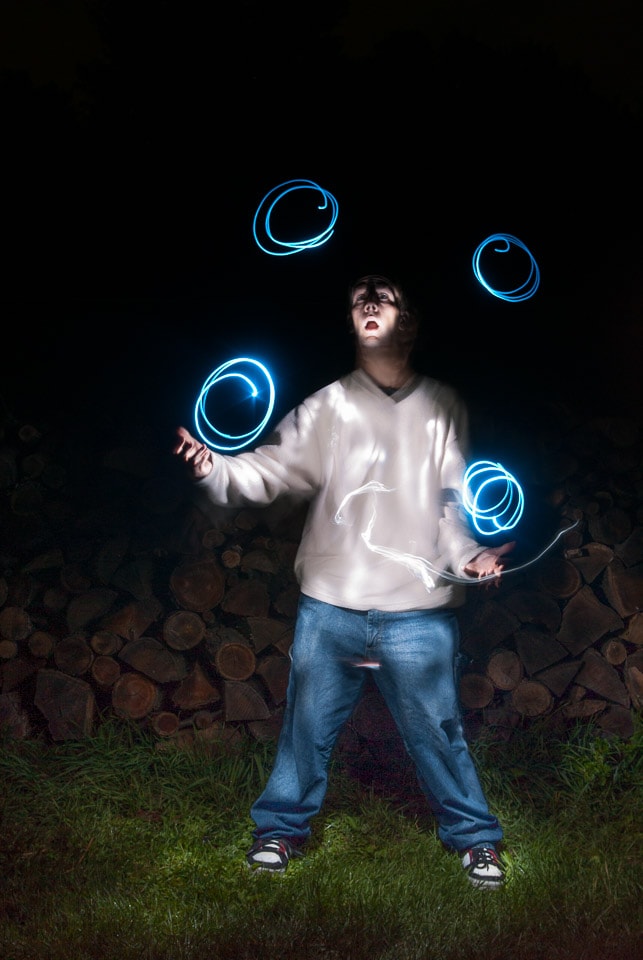 |
| A small flashlight was used to paint myself and light circles. |
Painting With Light: If you have a flashlight, you too can juggle balls of light! In the picture above, I used ISO 100 to keep it low on noise, f/8 as a good mid-ranged aperture, and 96 seconds for the exposure. Why 96 seconds? Because that was how long it took me to paint myself in with the flash light and get back to the camera to end the exposure! This was one of several shots I took. I didn’t know how bright the flashlight would appear to the camera, so I had to experiment with how much to paint. How slow, how long, etc… In hindsight, a single camera flash on me could have captured me, then I could have simply painted the balls of light.
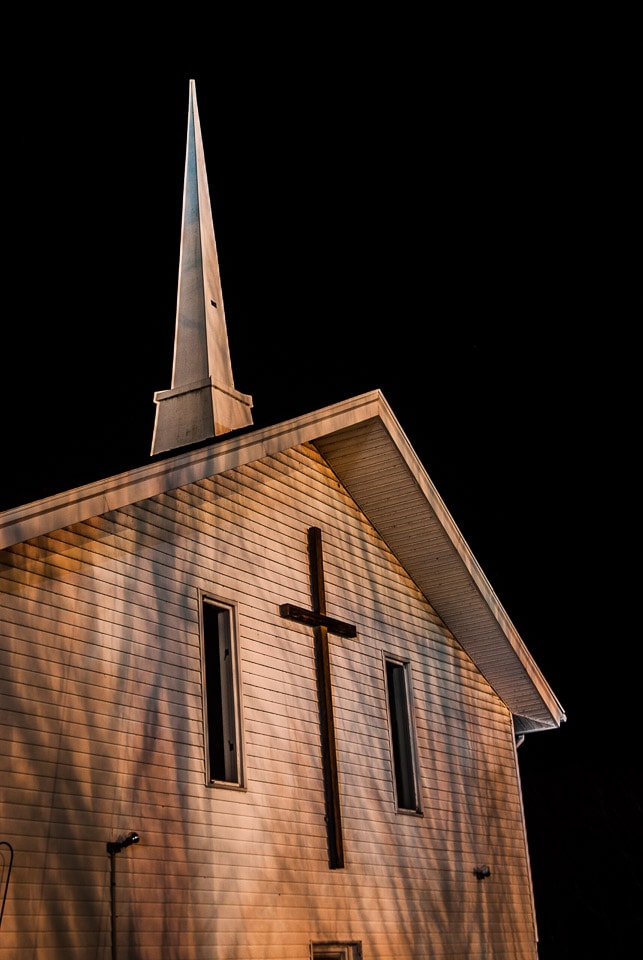 |
| Available lighting, 15 seconds. |
Dark Thoughts: Whether shooting in the dark or in the day with an ND filter, you should consider WHY you are shooting a long exposure. During the day, it might be to blur a waterfall until it is silk. At night, it might be to capture lighting conditions as they would never be if left to the sun alone. That was the case with the image above. Street lights shining at the church cast tree silhouettes on the building. The photo is as much about the shadows as it is about the church. When processing the image, I bumped up the contrast and clarity higher than I normally would have to enhance the shadow. In the daylight, there would have been no shadow.
Processing: In general, especially for anything involving the night sky, you want lots of contrast and clarity. Consider the image below (Note: the lack of star trails is due to a feature of my camera):
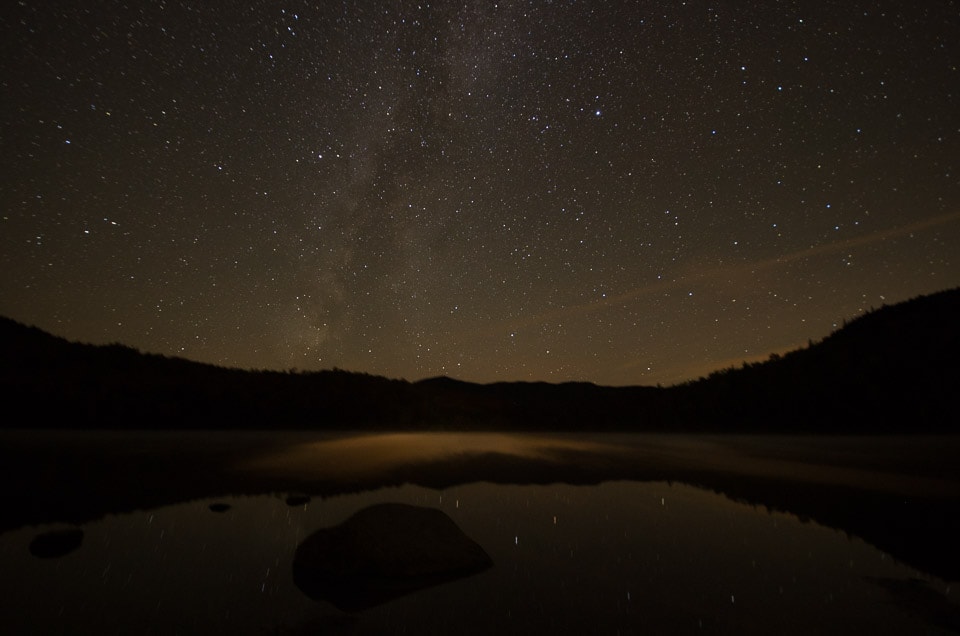 |
| 2 miutes at ISO 1600. |
Not a bad image, but definitely not what anyone would classify as a good image either. The Milky Way is there, but it lacks the “pop” a lot of images of the night sky have. So I increased Contrast to 90 and Clarity to 90. Way higher than I’d normally go. I also made some adjustments to exposure, highlights, shadows, etc… But 90% of the change you see in the image below is from changing Contrast and Clarity:
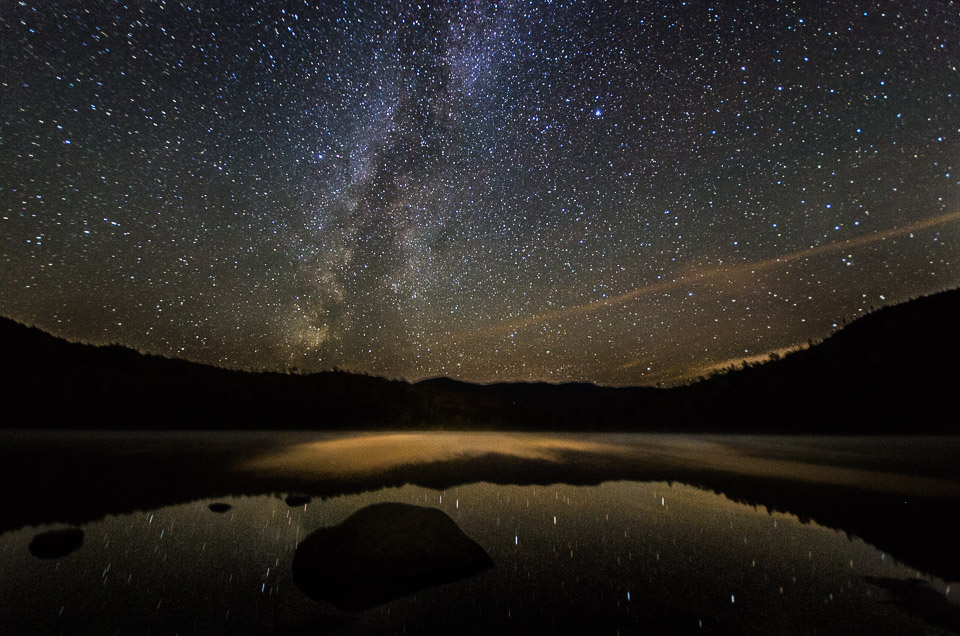 |
| Same image as above. |
I personally think this one is actually a little overdone, but the point is clear. This image has lots of noise in it, but it doesn’t really take away from the image. I can reduce the noise, but keep in mind that pinpoints of dim stars will be destroyed by the process, so be careful. I’ve adjusted the white balance, but I had no specific technique for this. I just made it look “right” to my eye. This can be subjective, as I’m not documenting the exact scene, but rather creating an image.
This has been a rather lengthy blog, yet there is so much left to say on this topic. Maybe a future blog? Perhaps send me questions and I’ll answer them as they come? Definitely experimenting during the warm weather coming this week. I hope this has helped clear up some questions people have had so they can stop sweating and start shooting.